How to start building Jamstack Apps in .NET utilizing Statiq and headless CMS.
Are you interested in Jamstack, but sad you can't practice it with .NET? The times have changed, and .NET developers are now able to build Jamstack apps using the new static site generator Statiq. This article walks you through the setup of a ready-to-use boilerplate! If you are new to Jamstack on .NET, follow the steps below to wrap your head around the basics. If you know the drill, skip that part and use the boilerplate.
Technologies
Let's briefly introduce Jamstack. It is a web architecture based on the pre-rendered assets (HTML files, images, CSS, etc.) that are generated at the build time based on templates and data.
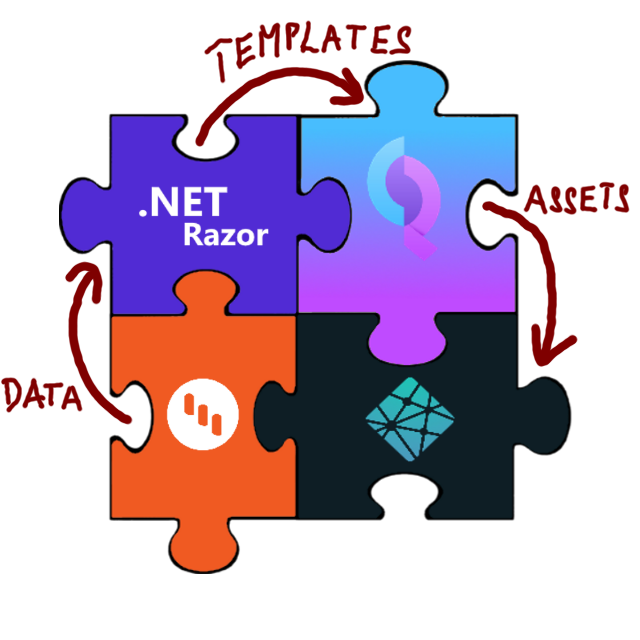
Now, let's jump right to the available technologies. First is Statiq, a generation platform providing the .NET based Statiq.Framework for creating a static site generator infrastructure and a set of modules called Statiq.Web that will make the initial configuration of the framework easier.
The next pieces of the puzzle are the templates and data storage. I have chosen Razor as a template engine since it is the most known one in the .NET world. Data will be provided by a headless CMS—Kentico Kontent. It provides more flexibility and collaboration features in comparison with markdown files, and it has a Statiq module out of the box.
The last piece is to get all the assets and deploy them to Netlify.
Let's start
The whole boilerplate creation is split into three parts—an application skeleton, a content source, and a connector that allows Statiq to generate pages.
Before you do anything else, download and install a .NET 5 if you haven't already.
Prepare the application
First, use dotnet CLI to create a new console application.
dotnet new console --name FromZeroToHeroThen, navigate to the application folder and install a Statiq.Web Nuget package (which will also download Statiq.Framework as a dependency).
cd FromZeroToHero
dotnet add package Statiq.Web -v 1.0.0-*
And then configure Statiq.Framework in Program.cs to use the default configuration of the Statiq.Web modules.
using System.Threading.Tasks;
using Statiq.App;
using Statiq.Web;

namespace FromZeroToHero
{
  public class Program
  {
    public static async Task<int> Main(string[] args) =>
      await Bootstrapper
        .Factory
        .CreateWeb(args)
        .RunAsync();
  }
}
💡 At this point, if you run dotnet run -- preview, you can browse your empty site at http://localhost:5080 💡
Prepare content
As the title mentioned, the boilerplate is about going "from zero to hero". This means creating a "Hero" content model that consists of a headline, summary, and CTA. Plus creating one content item based on that model. We'll do all that in a headless CMS Kentico Kontent as it already features Statiq integration.
- First, create an account at Kontent.ai.
- The link above will provide you with a 90-day trial. Once you finish the trial, or even during the trial period, you can switch to the Developer plan, which is free of charge and lets you run small projects with $0 budget.
- After signing up, create an empty project.
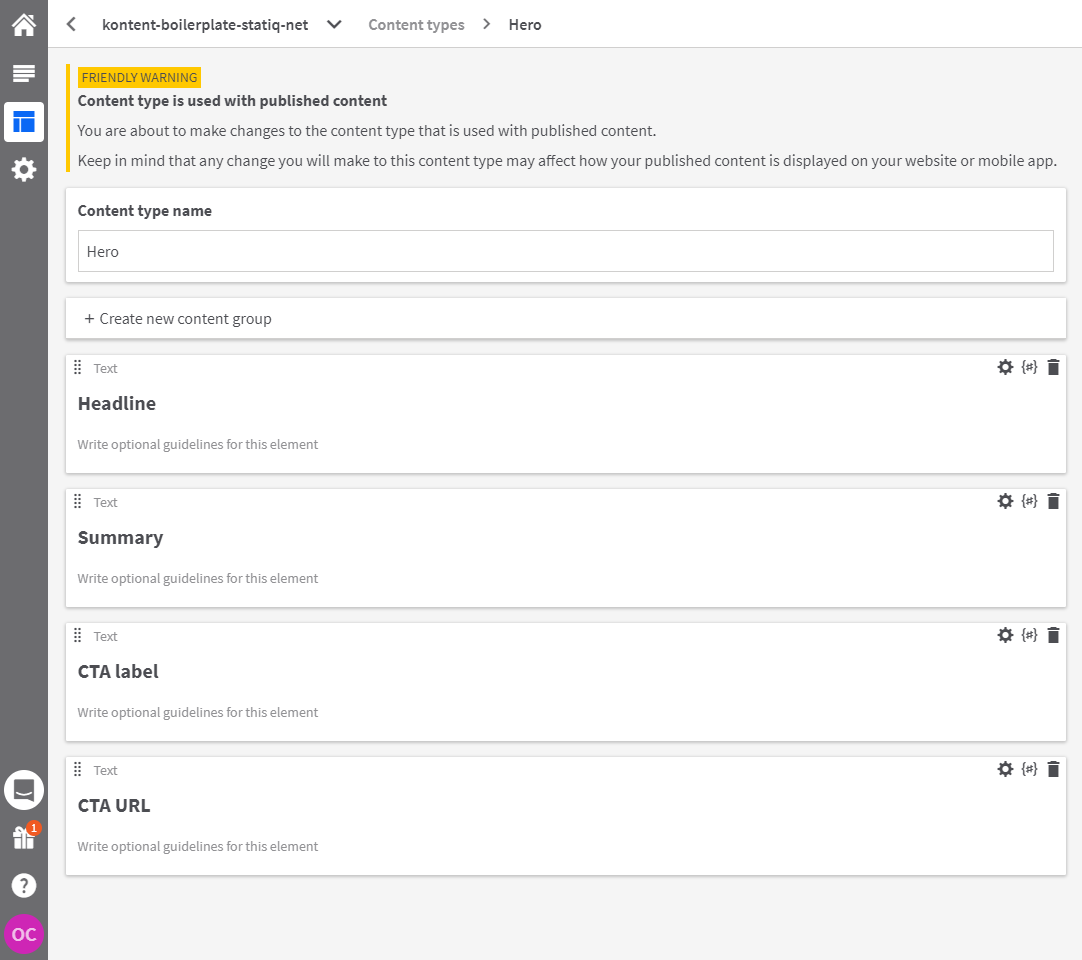
- From your Kontent project, go to Content models and add a new Content type called "Hero" with these text fields:
- Headline
- Summary
- CTA label
- CTA URL
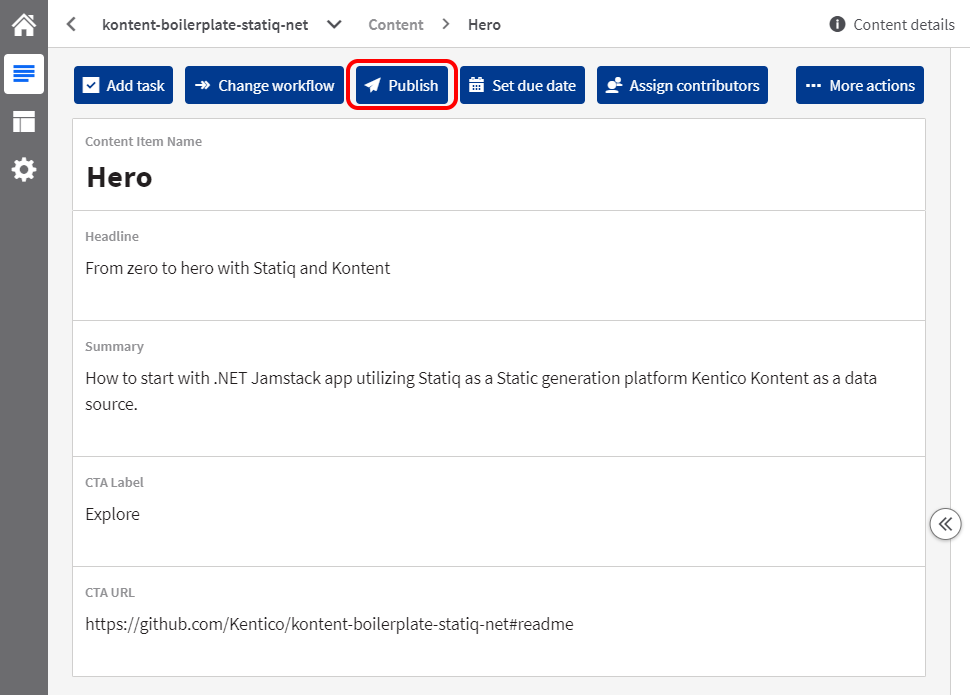
- Go to Content & Assets section in your project and click Create new on the Content tab and select Hero content type and fill the elements
- Content Item Name: Hero
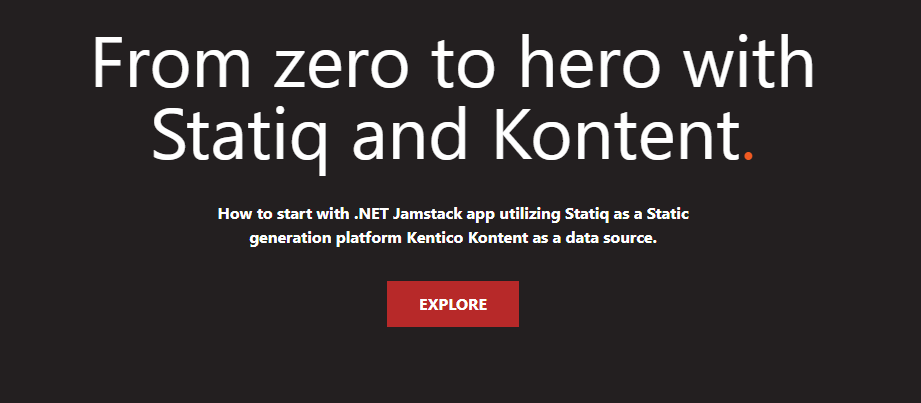
- Headline: From zero to hero with Statiq and Kontent
- Summary: How to start with the .NET Jamstack app utilizing Statiq as a Static generation platform and Kentico Kontent as a data source.
- CTA label: Explore
- CTA URL: https://github.com/Kentico/kontent-boilerplate-statiq-net
- Publish the changes
Connect content and the site
Now let's load the content from the headless CMS using Kontent.Statiq module and render it with Razor engine.
First, install Kontent.Statiq module:
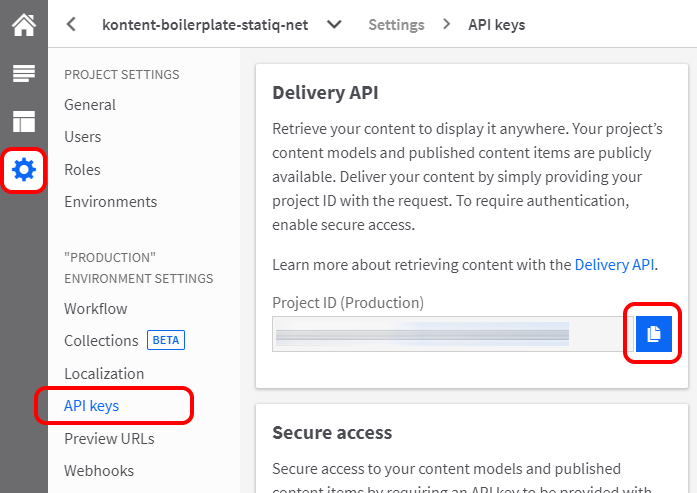
dotnet add package Kontent.Statiq --version 1.0.0-*Copy the Project ID from the Kontent application.
- Enter Kontent application
- Go to "Project Settings" and select "API keys"
- Copy "Project ID"
Then install the Kontent Model Generator for .NET and generate our Hero model.
dotnet new tool-manifest
dotnet tool install Kentico.Kontent.ModelGenerator
dotnet tool run KontentModelGenerator --projectid "<projectid>" --namespace "FromZeroToHero.Models" --outputdir "Models" --generatepartials true --structuredmodel true
For more specific information about the model generator configuration, follow the generator's Readme.
After generation, you will end up with three files Models/Hero.Generated.cs, which is a POCO model class, then Models/Hero.cs that allows extending the model class, and the last one is Models/CustomTypeProviders.cs that will be used to provide model mapping information.
The next step is to initialize the Kontent Delivery SDK client for dependency injection. Extend Program.cs file with ConfigureServices.
using System.Threading.Tasks;
using FromZeroToHero.Models;
using Kentico.Kontent.Delivery.Abstractions;
using Kentico.Kontent.Delivery.Extensions;
using Microsoft.Extensions.DependencyInjection;
using Statiq.App;
using Statiq.Common;
using Statiq.Web;

namespace FromZeroToHero
{
    public class Program
    {
        public static async Task<int> Main(string[] args) =>
          await Bootstrapper
            .Factory
            .CreateWeb(args)
            .ConfigureServices((services, config) =>
            {
                // Add the type provider
                services.AddSingleton<ITypeProvider, CustomTypeProvider>();
                // Configure Delivery SDK
                services.AddDeliveryClient(opts =>
                    opts.WithProjectId("<projectid>")
                        .UseProductionApi()
                        .Build());
            })
            .RunAsync();
    }
}
All of your assets and templates should be placed in the /input folder. Create a view file _Hero.cshtml in the /input folder then and use generated FromZeroToHero.Models.Hero class as a model for the template.
@model FromZeroToHero.Models.Hero;

<!DOCTYPE html>
<html lang="en">
<head>
  <meta charset="UTF-8">
  <meta name="viewport" content="width=device-width, initial-scale=1.0">
  <title>@Model.Headline</title>
</head>
<body>
  <h1>@Model.Headline</h1>
  <div>
    @Model.Summary
  </div>
  <div>
    <a href="@Model.CtaUrl">@Model.CtaLabel</a>
  </div>
</body>
</html>
And finally, to connect the configured client to load the data to the model and pass them to the Razor engine, we will define a new Statiq Pipeline. The pipeline is like a Controller from MVC. Create a new file in Pipelines/HeroPipeline.cs. By inheriting from Statiq.Core.Pipeline, Statiq automatically includes your pipeline in the generation process.
using FromZeroToHero.Models;
using Kentico.Kontent.Delivery.Abstractions;
using Kentico.Kontent.Delivery.Urls.QueryParameters;
using Kentico.Kontent.Delivery.Urls.QueryParameters.Filters;
using Kontent.Statiq;
using Statiq.Common;
using Statiq.Core;
using Statiq.Razor;

namespace FromZeroToHero
{
    // <see href="https://statiq.dev/framework/pipelines">Pipelines documentation</see>
    public class HeroPipeline : Pipeline
    {
        public HeroPipeline(IDeliveryClient client)
        {
            ProcessModules = new ModuleList
            {
                // Load "Hero" item and transfer it into IDocument.
                // <see href="https://github.com/alanta/Kontent.Statiq">Kontent.Statiq</see>
                new Kontent<Hero>(client)
                    .WithQuery(
                        new EqualsFilter("system.codename", "hero"),
                        new LimitParameter(1)
                    ),
                // Load Razor template to IDocument content.
                // <see href="https://github.com/statiqdev/Statiq.Framework/blob/main/src/core/Statiq.Core/Modules/Content/MergeContent.cs">MergeContent</see>.
                // <see href="https://statiq.dev/web/content-and-data/content/">Content propery of IDocument</see>
                new MergeContent(
                    new ReadFiles(patterns: "_Hero.cshtml")
                ),
                // Render HTML file from Razor template and document typed as Hero model.
                // <see href="https://github.com/statiqdev/Statiq.Framework/blob/main/src/extensions/Statiq.Razor/RenderRazor.cs">RenderRazor</see>
                new RenderRazor()
                    .WithModel(KontentConfig.As<Hero>()),
                // Set file system destionation for the document.
                // <see href="https://github.com/statiqdev/Statiq.Framework/blob/main/src/core/Statiq.Core/Modules/IO/SetDestination.cs">SetDestination</see>
                new SetDestination(new NormalizedPath("index.html")),
                // Flush the the output.
                // <see href="https://github.com/statiqdev/Statiq.Framework/blob/main/src/core/Statiq.Core/Modules/IO/WriteFiles.cs">WriteFiles</see>.
                new WriteFiles()
            };
        }
    }
}🚀Done! Now run dotnet build -- preview and see your first hero page at http://localhost:5080🚀
- Raw boilerplate is on GitHub under raw-boilerplate tag
Fine-tuning
The following sections describe how to extend a boilerplate with Razor layout standards, basic styling, and configuration settings. These changes are already included in the boilerplate.
Razor conventions
Razor works the standard way in the Statiq environment. By creating _Layout.cshtml in the input folder and specifying the default layout in _ViewStart.cshtml like below, you prepare the standard setup for adding the pages with the same layout (as was done in this commit with _Hero.cshtml template).
@{
    Layout = "_Layout";
}
Sass
Since the Sass (as well as Less) is already pre-configured in Statiq.Web default modules, it is possible to create a sass file in the input folder and then reference it by the same name with .css extension. Create main.scss file and reference its transpiled version in the Razor view using @IExecutionContext.Current.GetLink("/main.css") and add some basic styling (see the implementation).
Extract Project ID
It is a good idea and a .NET best practice to extract configuration to settings files. To extract the Kontent delivery client configuration to this file, create an appsettings.json file with the DeliveryOptions section containing only one property ProjectId. Then in Project.cs configure the delivery client to dependency injection (see the implementation):
services.AddDeliveryClient((IConfiguration)config)That action also opens the door for you to use different sets of configurations depending on the environment i.e. use configuration with a preview API key for your local development environment.
Conclusion
In this article, I showed you how to build a simple Jamstack site using .NET and static site generator Statiq. We created a new content type with some content in a headless CMS, connected the CMS to our application, and converted the data into generated static pages. Find the complete implementation here:
If you want to see a more complex example, check out the Kentico Kontent Statiq - Lumen Starter.
